If you’ve started building with the Optimizely Content JS SDK, you’ve probably run into three similarly-named rendering components and wondered which one does what: OptimizelyComposition, OptimizelyGridSection, and OptimizelyComponent. Here’s a brief overview of each.
- Optimizely Composition
OptimizelyComposition is the top-level renderer for an experience. You use it on any content type with baseType: '_experience' and it walks the composition tree and delegates each part to the right renderer. Think of it as the entry point that turns the visual builder’s structure into rendered output.
- Optimizely Grid Section
OptimizelyGridSection renders a single section and its grid layout of rows and columns. Sections are the containers inside a composition, and this component arranges their child elements into the grid.
- Optimizely Component
OptimizelyComponent renders an individual block at the leaf level of the tree. It resolves a content type to its registered React component.
The diagram below brings all three together under one umbrella.
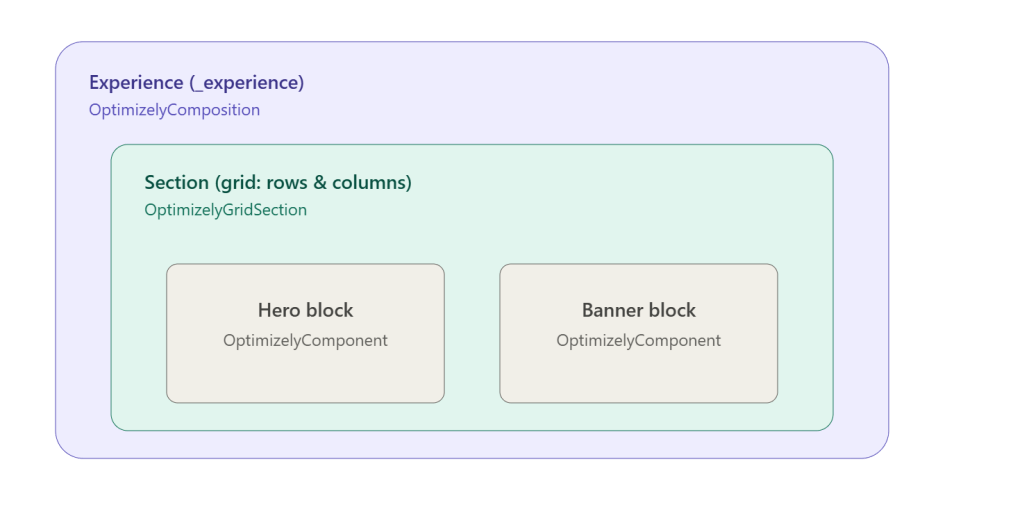
Putting It All Together: Experience → Section → Component
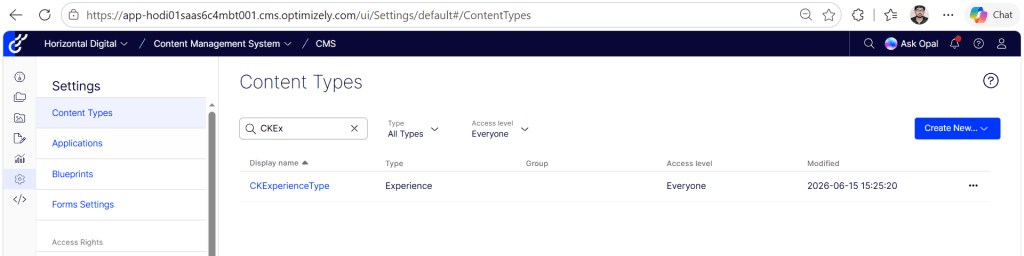
I’ve added an experience content type in Optimizely, shown below.
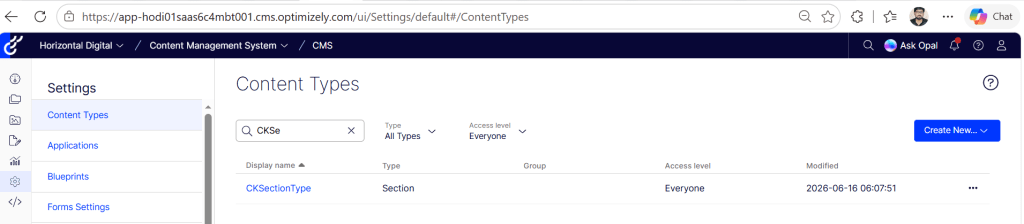
Next, I created a section type to be added inside experiences built from the experience type above.
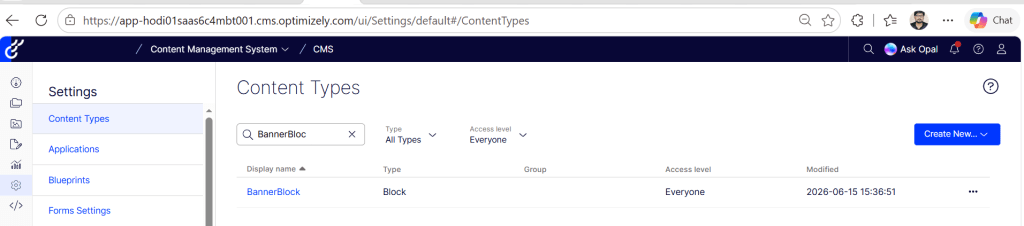
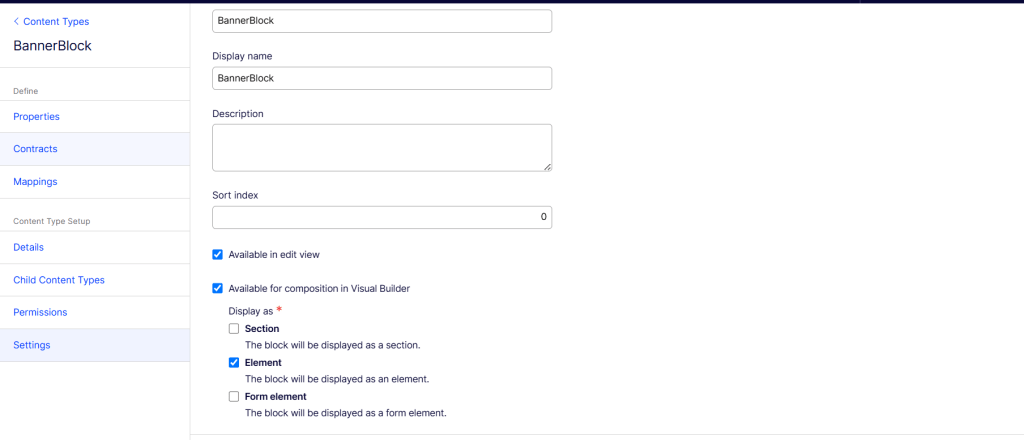
Next, I created a Banner Block that sits inside the section type above.
Note: For the Banner Block to be allowed inside the section type, you need to enable the Element checkbox under the Settings tab, as shown below.
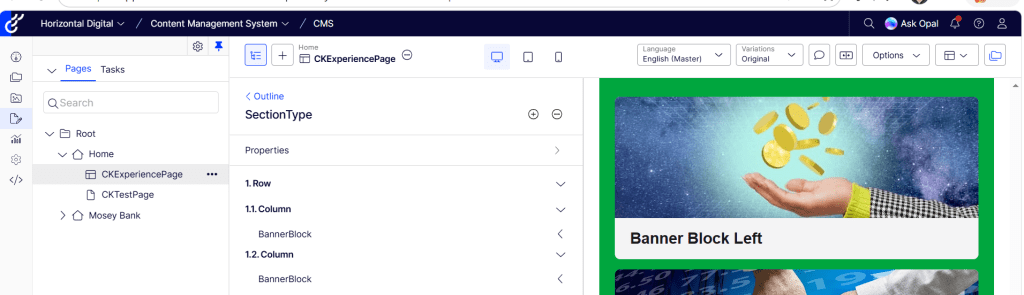
Once the content types are modeled, we can create an experience page in the visual builder, as shown below, and add the section type created above inside it. The section contains a single row with two columns, and a Banner Block is added to each column.
Wiring Up the Components
With the content types modeled, let’s look at the code for each component in the head application.
The content type modelled in Optimizely SAAS are pulled into the Head app through running the below command.
npx @optimizely/cms-cli config pull --output ./src/content-types --group
With the models pulled into the file system, let’s add the code for each of the components above.
- Create experience type component inside ‘src/components/experience/{{ExperienceType}}.tsx’ file.
import type { ContentProps } from '@optimizely/cms-sdk';
import { getPreviewUtils, OptimizelyComposition } from '@optimizely/cms-sdk/react/server';
import type { CKExperienceTypeCT } from '@/src/content-types/experience/CKExperienceType';

type CKExperienceTypeContent = ContentProps<typeof CKExperienceTypeCT>;

type Props = {
  content: CKExperienceTypeContent;
  displaySettings?: Record<string, string | boolean>;
};

export default function CKExperienceType({ content }: Props) {
  const { pa } = getPreviewUtils(content);

  return (
    <article className="mx-auto w-full max-w-6xl px-6 py-12">
      {content.composition?.nodes && (
        <div className="flex flex-col gap-8">
          <OptimizelyComposition nodes={content.composition.nodes} />
        </div>
      )}
    </article>
  );
}
This is the experience component, mapped to the CKExperienceType content type created above. Because the type is built on baseType: ‘_experience’, its visual-builder layout is exposed as content.composition.nodes, which we hand to OptimizelyComposition. That single component then renders the entire composition tree—sections, rows, columns, and the blocks inside them—so the experience component itself stays this thin. The pa() helper from getPreviewUtils wires the experience up for inline editing in the visual builder.
2. Next, create the section type component inside ‘src/components/sectiontype/{{SectionType}}.tsx’ file.
import type { ContentProps } from '@optimizely/cms-sdk';
import { getPreviewUtils, OptimizelyGridSection } from '@optimizely/cms-sdk/react/server';
import type { CKSectionTypeCT } from '@/src/content-types/section/CKSectionType';

type CKSectionTypeContent = ContentProps<typeof CKSectionTypeCT>;

type Props = {
  content: CKSectionTypeContent;
  displaySettings?: Record<string, string | boolean>;
};

export default function CKSectionType({ content }: Props) {
  const { pa } = getPreviewUtils(content);

  return (
    <section className="mx-auto w-full max-w-6xl px-6 py-10">
      {content.nodes && content.nodes.length > 0 && (
        <div className="flex flex-col gap-6">
          <OptimizelyGridSection nodes={content.nodes} />
        </div>
      )}
    </section>
  );
}
This is the section component for the CKSectionType we created above. Its grid layout—the rows and columns—comes through as content.nodes, which we pass to OptimizelyGridSection. That component handles arranging the columns and rendering the blocks inside each one. As before, the pa() helper from getPreviewUtils makes the section editable in the visual builder.
3. Next, add the BannerBlock component inside ‘src/components/component/BannerBlock.tsx’ file as below.
import type { ContentProps } from '@optimizely/cms-sdk';
import { getPreviewUtils } from '@optimizely/cms-sdk/react/server';

import type { BannerBlockCT } from '@/src/content-types/component/BannerBlock';

type BannerBlockContent = ContentProps<typeof BannerBlockCT>;

type Props = {
  content: BannerBlockContent;
  displaySettings?: Record<string, string | boolean>;
};

export default function BannerBlock({ content }: Props) {
  const { pa } = getPreviewUtils(content);
  const imageUrl = content.BannerImage?.default ?? content.BannerImage?.hierarchical;

  return (
    <section className="relative w-full overflow-hidden rounded-lg bg-zinc-100 dark:bg-zinc-800">
      {imageUrl && (
        <div {...pa('BannerImage')} className="relative aspect-[3/1] w-full">
          <img
            src={imageUrl}
            alt={content.BannerTitle ?? ''}
            className="h-full w-full object-cover"
          />
        </div>
      )}
      {content.BannerTitle && (
        <div className="px-6 py-4">
          <h2 {...pa('BannerTitle')} className="text-2xl font-bold text-zinc-900 dark:text-zinc-50">
            {content.BannerTitle}
          </h2>
        </div>
      )}
    </section>
  );
}
You can find more details on the Banner Block component in my previous blog post.
And that’s how the three rendering components fit together. OptimizelyComposition renders the experience and walks the whole tree, OptimizelyGridSection lays out the rows and columns within a section, and OptimizelyComponent renders each block at the leaf level.
Note: OptimizelyComposition recursively renders the entire composition, resolving each component node to your registered component—the same job OptimizelyComponent does for a single block.
Final Thoughts
These three components aren’t competing options—they’re three layers of one tree: OptimizelyComposition renders the experience, OptimizelyGridSection handles a section’s grid, and OptimizelyComponent renders each block.
What I like most is how little code each component needs. Because the SDK handles the recursion and the content-type-to-component resolution, every component in this post stayed just a few lines—you describe where to render, and the SDK works out what to render. It’s the same composability that made the single-component setup in my last post scale so naturally.
From here, the natural next step is customizing section layouts and display templates in the visual editor. I’ll cover that in an upcoming post.
Happy Optimizing!!!
 Lets unveil Optimizely