You open an Experience page in Visual Builder. You need a simple registration form. So you click Add Section and start scanning the list for “Form.”
It isn’t there.
No Form. No Form Container. Nothing close. You check the docs. You check your permissions. You start wondering if your instance is missing something.
It isn’t. You’re just looking in the wrong place.
In Optimizely CMS (SaaS), a form isn’t a section you drop on a page — it’s a Shared Block. You build it once, publish it, and then add it to your page. That single detail is why almost everyone hits a wall on their first try.
This post walks the whole path: activating Forms, creating the Form Container block, building it out, and placing it on an Experience page.
Let’s start where everyone forgets to — activation.
Step 1 — Activate Forms
Forms are switched off by default. Until you turn them on, the Form Container block type simply doesn’t exist in your instance — which is half the reason the search-and-find-nothing experience is so confusing.
Do this first:
- Go to Settings → Forms Settings
- Click Activate
That’s it. One click.
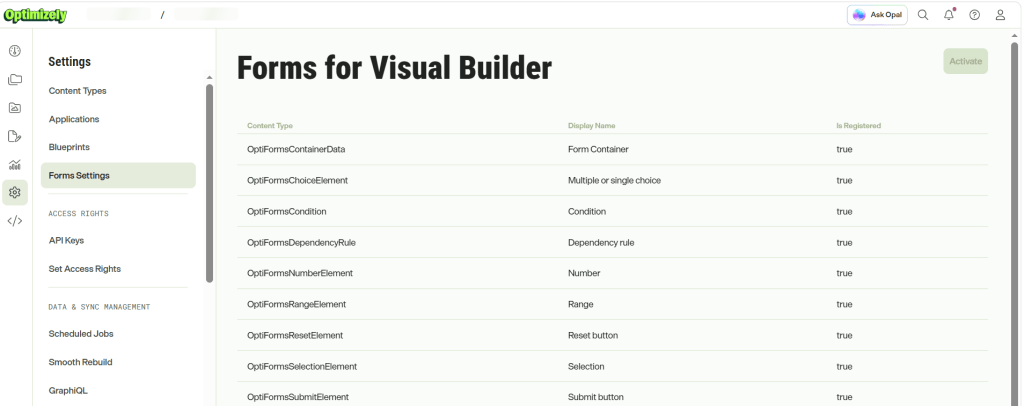
Once activated, a new block type — Form container — becomes available. That’s what we build next.
Step 2 — Create the Form Container Shared Block
This is the part that trips everyone up. You don’t build a form on a page — you build it as a Shared Block, then bring it to the page later.
Think of it like a reusable component: build once, use anywhere.
Here’s how:
- From the Edit View (or the Content Tree), click the
+button next to your site/page root - Choose Create Shared Block
- Pick a folder to store it in — For All Applications works if you want it reusable across sites
- Give it a name — say, Contact Us Form
- For block type, select Form container ✅
Hit create, and you now have an empty form waiting to be built.
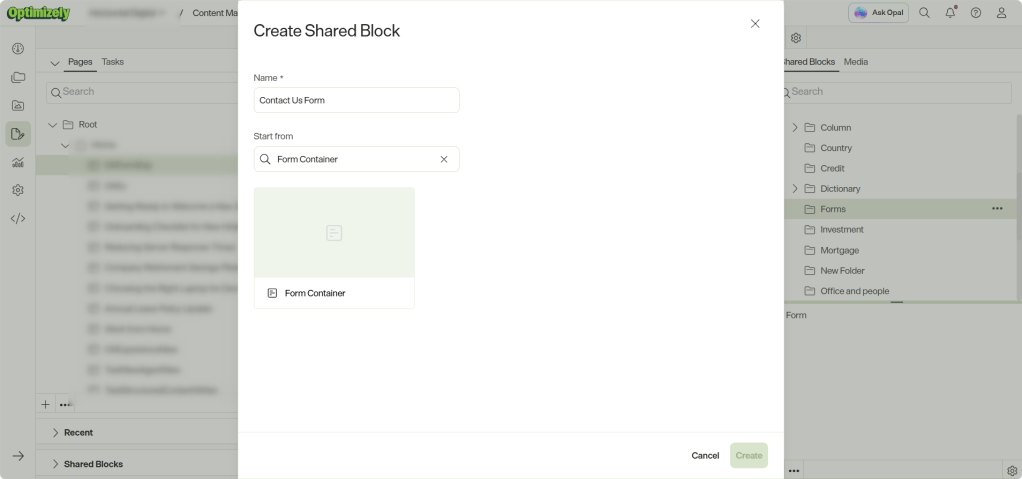
The container is the shell. Now let’s fill it.
Step 3 — Build the Form
Open your new Contact Us Form block. It’s empty — time to give it some structure.
Optimizely forms nest like this:
Form Step └── Row └── Column └── Element ← your actual fields
Slightly more clicking than you might expect, but it’s what gives you real control over layout.
Build it out:
- In the left panel, click Add a form step
- Inside the step, click Add Row
- Inside the row, click Add Column
- In the column, click Add Element and pick your field — Textbox, Choice, Selection, Number, and more
- Configure each element: Label, Placeholder text, and Validators (Required field, etc.)
- Repeat rows and columns until your layout looks right
- Add a Submit element — without it, nobody’s submitting anything 🙂
- Click Publish
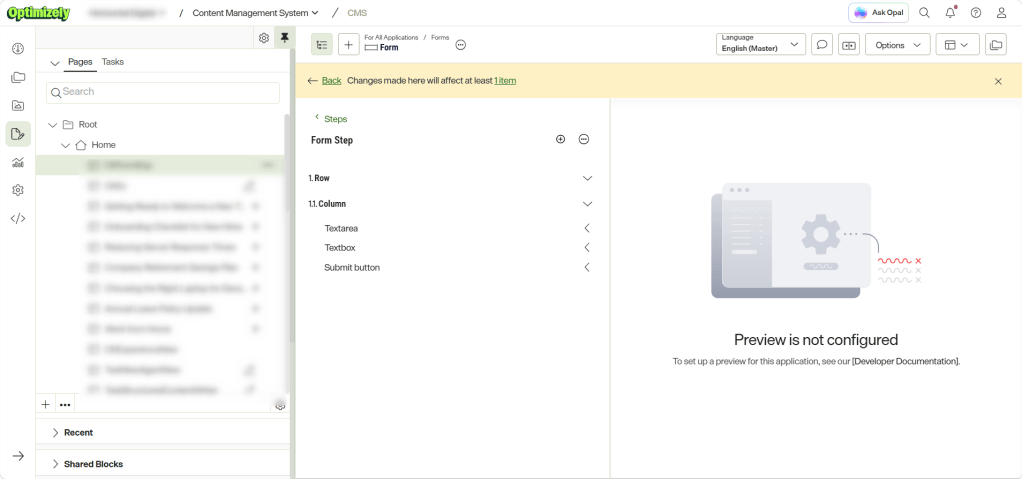
⚠️ Don’t skip Publish. A draft block won’t show up when you go looking for it on your Experience page — and that sends you straight back into “where is it?” mode.
💡 Multiple steps = multi-step form. Want a wizard-style form with Next/Back? Just add more form steps. One step is a plain single-page form.
Your form exists and is published. Last piece: getting it onto a page.
Step 4 — Add the Form to Your Experience Page
The block is built and published. Now let’s put it where people can actually see it.
Remember: it’s a Shared Block, so that’s exactly how you add it.
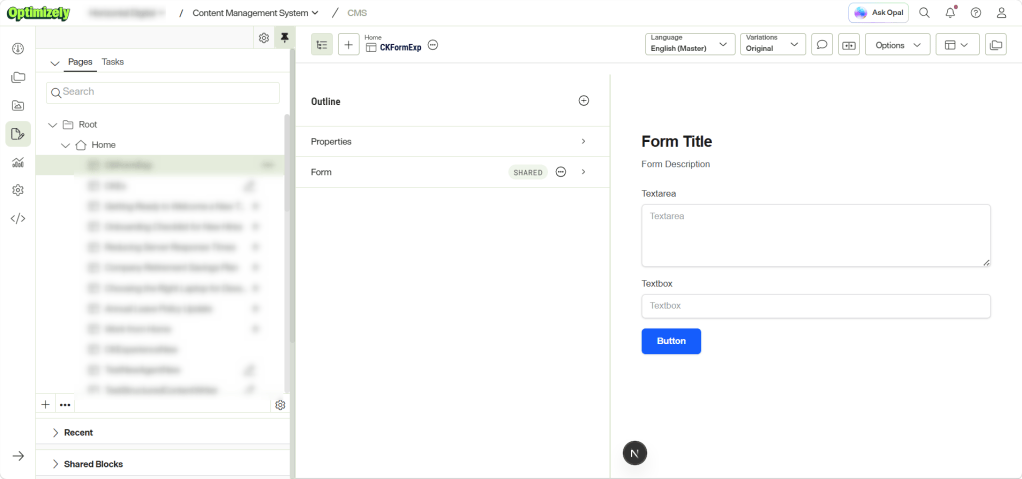
- Open your Experience page in Visual Builder
- In the page outline, click
+→ Add Shared Block… - Search for Contact Us Form and insert it into the outline
- Click Publish on the Experience page
That’s it. Your form is live. 🎉
Quick Recap
| # | Move | Where | Don’t forget |
|---|---|---|---|
| 1 | Activate Forms | Settings → Forms Settings | Off by default — nothing works until this is on |
| 2 | Create a Form container block | + → Create Shared Block | Name it something you’ll recognise later |
| 3 | Step → Row → Column → Elements | Inside the block | Add a Submit element, then Publish |
| 4 | Insert via Add Shared Block… | Experience page | Publish the page too |
The whole thing clicks into place once you stop looking for a “Form” section and start thinking in Shared Blocks.
What’s Next — Rendering Forms in Code
Building the form in the CMS is the easy half.
On SaaS CMS a form is just content. Optimizely gives you the structure — your frontend decides how it looks. Every element type needs its own React component, mapped through the Optimizely CMS SDK and fed by Optimizely Graph.
Which opens up the interesting questions:
- How do you map Textbox, Choice and Selection to your own components?
- Where do validators actually run?
- What happens on submit — and where does the data go?
That’s the next post: each form element, implemented properly with the Optimizely CMS SDK, with working code.
Stay tuned. 👀
Final Thoughts
Forms in Optimizely SaaS CMS aren’t hard. They’re just unfamiliar.
Every other CMS trained you to think “add a form to the page.” SaaS CMS asks you to think “build a form, then reuse it.” That one mental flip is the whole learning curve — and once it clicks, the rest is muscle memory.
There’s a real payoff too. Your Contact Us Form isn’t stuck on one page. It’s a Shared Block: use it on ten pages across three sites, change it once, and every instance updates.
So next time Visual Builder doesn’t show you what you’re looking for, ask where it actually lives. SaaS CMS usually has a reason.
Happy Optimizing!!!
 Lets unveil Optimizely